I've been so bad at blogging in the past few years. I blog so I can remember. I painted a set of chest of drawers a few years ago in our other house and I loved the result. The only problem is I didn't blog about it so I have no record of what I did to it. I have no idea what red paint color I used. I thought I had it written on FB but I have searched and searched and I can't find anywhere where I wrote the paint color so now I have this wonderful red chest of drawers and have no idea what the color is. I didn't want that to happen again so I am making sure that I write about the chest of drawers in our master bedroom that I recently painted.
Here is the piece of furniture before
Sorry about me in my robe in the mirror. LOL! I really wanted to lighten this up so I decided I would paint it white. I LOVE white and thought it would be great SO I used this chalk paint that I got at Michael's. I had already used it on my coffee table and thought it would be fine to use on this, too.
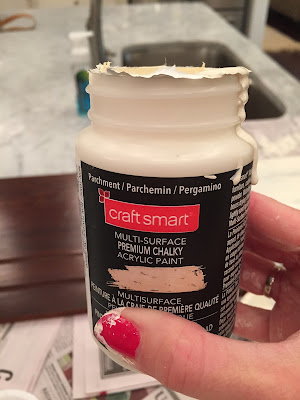
So I used this Craft Smart chalk paint in the color parchment. I started to paint the chest of drawers and didn't like how the chalk paint looked.
See how it's all splotchy. Also, I thought it looked too stark white. So then I decided I would just paint it a pretty blue color that I already had in the garage...anything to not have to go to the paint store! LOL!
This is the color that I painted on our closet ceiling. I think it's so pretty.
It's called Rain by Sherwin Williams
I went ahead and did a full coat of chalk paint underneath the blue color because then I didn't have to sand at all. Painting with chalk paint is much easier than sanding if you ask me! And the paint sticks great over chalk paint.
I finished the Rain color and lived with it a few days. I decided I didn't like it because it was too baby blue. It needed a little something but I didn't know exactly what. I thought I would distress it but it still looked too baby blue. So then I decided that I would stain over it and use the stain that I had in the garage. Again, anything to avoid going to the store! :)
This is what I had in the garage...Minwax in Espresso. We used this on the top of our kitchen table (that I need to write about before I forget what I did). At first it looked really bad because I didn't really know what I was doing. You can kind of see in the picture above (behind the paint brush) what it looked like. So, I stopped staining and just decided I would repaint the whole thing white (in our trim paint) the next day. Well, when I woke up the next morning, I decided I had nothing to lose so I decided I would try one more time with the stain.
This time I got it down! YAY! I just took a little bit of stain and put it on a brush and then took old cut up tees (that I bought from Home Depot) and wiped it off...and wiped hard! I was a little sore the next day. LOL!
I love the color! It's not baby blue anymore.
Here's the finished product. It looks a little streaky in the picture but to the human eye you don't see the streaks as much. I really love this piece of furniture now and I LOVE the color. I'm so glad because I just used what I had in the house and ended up loving it!
Here's a better picture...better because my Moses is in it and it's closer up so you can see the color better. This is Moses' 5 month picture. He is now 8 1/2 months and a lot bigger.
This project took awhile and was all over the place but I like the final result. Next I need to blog about the kitchen table that I painted and stained. I have already forgotten the white paint we used but I do know it's in the garage so I will find it and write about it.
Paint colors:
Chalk paint: Craft Smart in Parchment
Paint: Sherwin Williams Rain
Stain: Minwax Espresso


Comments